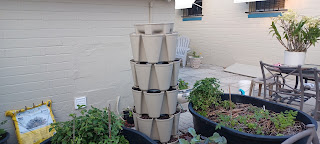
Interested in a GreenStalk Garden? Here is how I set up and what I planted in my first GreenStalk.
A GreenStalk Garden can be a great way to increase your growing area even in a small space. My garden is on my patio, and while I've expanded to include a couple of raised beds, a GreenStalk lets me add more.
You can watch the video of the entire set-up, or read below for how I set mine up.
Setting up your GreenStalk is easy, but there are a few tips I learned while setting mine up.
This article contains affiliate links. That means if you click the link and make a purchase, I may receive compensation at no additional cost to you.
Included with your GreenStalk are instructions. They are not complicated, but be sure and read through them carefully.
How to Set Up Your GreenStalk Garden
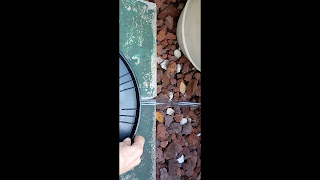
After unboxing your GreenStalk, be sure you place it on a firm and level area. This was a mistake I made. The area I put it in is filled with lava rock. I leveled the rock as much as I could, then placed a concrete paver on it. It seemed sturdy and level, but when I put the base on it, I found it wasn't. First, the paver wasn't large enough for the entire base to sit on, and second, it wasn't level.
My husband realized the problem and took out the lava rocks, put down two pavers, and firmly tamped it in place. (Thanks, honey!!) When I set the base on it, I realized how much better it was.
If you have a base, a drainage tube will be included in your box. Go ahead and put that in, then set the base in place.
Assemble the GreenStalk Garden Tiers
To assemble the GreenStalk, take one tier and put it on the base if you have one. Fill with potting soil. As the instructions say, fill it completely. When you think it is full, add some more.
Then take one of the grey disks and place it on top of the tier. The disks are the water reservoir for each level, and small holes are near the edge to drip the water into the soil below. Line the holes up with each pocket of the tier.
Get another tier and put it on top of the first one. NOTE: Be sure the tier locks into place with the one below. It may not completely lock into place until you fill it with soil, so be sure and check after you fill it.
Fill with soil and place the grey disk. Be sure everything is lined up properly, then add the next tier.
Repeat until all tiers are in place, then place the reservoir on top, again locking it in place with the tier below.
Pour water into the top reservoir. Continue adding until it runs out of the drainage tube.
Your Greenstalk Garden is now ready to plant.
Two reminders:
- Be sure your GreenStalk is set on a firm and level area
- Make sure each tier locks in place.
Get Your Own GreenStalk Garden
Happy growing!


