Showing posts with label Homegrown. Show all posts

07 April 2023

Grow Your Own Sprouts and Always Have Fresh Greens

Sprouts are easy to grow on your kitchen countertop and can be ready in less than a week. Here’s how I do it.

Do you live in a climate where it is hard to grow lettuce? For me, in zone 9b in Florida, I can grow lettuce in the late fall and through winter, but the rest of the year, it is too hot.

Yet I want fresh greens to put on sandwiches and add to salads. I also want to produce more of my food and rely less on grocery stores.

I have found growing sprouts on my kitchen counter to be a great alternative. They are quick to produce, require little space, and are cost. 

This post contains affiliate links. This means if you make a purchase, I may receive a small amount of compensation at no additional cost to you.

Watch Video

Here's the video of my process for sprouting seeds. Supplies and instructions are below.


Supplies:

  1. Sprouting Seeds (I've purchased from Sprout People and from Mountain Rose Herbs with great results)
  2. Glass jar - I use a pint size
  3. Cover for the jar that lets you drain water – you can use cheesecloth and rubber band it around the top, which is what I did initially. However, it is messy, and the cheesecloth quickly wears out. I purchased a set of three from Sprout People and have found them to be a great help. You can easily change the screen from the smallest to larger holes to let the water drain effectively as the sprouts grow

To Sprout:

Put 1 tablespoon of sprouting seeds in the jar. If you have a larger jar, you can use more seeds and make more sprouts; however, be sure you will use them all before they go bad – mine last about 10 to 12 days in the refrigerator.

Cover seeds with plenty of water. You want to be sure they get completely wet.

Stir to be sure all seeds are wet.

Cover with a lid that will let you drain and let sit in a darker place on a counter for 8-12 hours. Different seeds have different soak times, so check the package or do an internet search for optimal soak times. I like to start mine in the evening and let them soak overnight.

Drain off the water. You may want to turn it upside down on a dish drainer to let the most of the water drain out.

Set the sprouts on the counter out of direct light.

About every 12 hours, add water to the jar and swirl it around to be sure all seeds are wet. Drain.

Continue with this until most of the seeds have sprouted and filled the jar. This will vary depending on the type of seed and the temperature of your home. Mine are ready a day or so earlier in summer than winter.

Remove from the jar and put in a container in the refrigerator.

How to Use Sprouts

  1. Put them on sandwiches. When it is too hot to grow lettuce, these are a great replacement. 
  2. Add them to salads.
  3. Mixed them into egg salad for a bit of crunch and flavor.
  4. Eat them out of hand as a snack.

02 July 2022

Tour of Zone 9b Urban Garden June 2022

A garden update for June 2022. I live in Zone 9b, Florida, have an urban, container garden.

The garden is going well this year. After taking out the hot tub and putting two raised beds in the space, there is a lot more room to grow things this year.

Which is good because my husband made a trip to Home Depot in March and came back with six bell pepper plants and six tomato plants of different varieties! The peppers went in one of the beds, while I continue to put tomatoes in smaller containers so they can be moved around. They don't do well under the worst of the Florida sun and I try to find places with a bit of shade for them.

Here's what the garden looks like in June 2022.

 
You can see much of the garden in this photo. In the raised bed nearest the camera, the flowering plant hanging over is a penta. There were two of them and they outgrew the space, so I moved one to the other raised bed.
 
In the tomato cage are a couple of everglades tomatoes. You may not be familiar with that variety. They are very small - smaller than a cherry tomato - but they do well in the Florida heat and humidity. I planted the seeds last fall, but they didn't germinate until earlier this year. I often pick 6-8 a day and find them a fun snack or addition to a salad.
 
There is also some celery in there. I planted it last fall and it did not do much, and I am shocked it has not completely died in the heat. Hasn't gotten big enough to really do anything with other than add flavor to cooked dishes, but I still have seeds and will try again this fall.
 
At the far end green beans trying to grow. I've had pretty good luck growing them in containers, but the ones I planted earlier this year in the raised bed did not do well. I realized that in this size raised bed, they need more water. That has helped, but I believe I need to get some shade cloth for them as well.  

The container with the blooming flowers next to the wall is Purple Opal Basil. I received the seeds free with an order from Baker Creek in 2020 and have been thrilled how well it grows here.


On the other side are containers with bell peppers I grew from seed, turmeric, amaranth with some of the tomatoes my husband bought, and a couple of the hanging baskets that were on the ground for a good watering.

Between the beds is a container with New Zealand spinach. This is not a true spinach, but a green that does grow well in my climate. I try to sow seeds every month or so to enjoy these in salads and on sandwiches. You can't tell, but there are also three loquat trees in there. I sprouted the seeds this spring, and am going to move them to larger containers.

Loquat is also known as Japanese Plum. The fruit is smaller than most plums, and has several large seeds in it. It blooms in January and the fruit is ready to pick in February and March.

I sprouted a seed about five years ago. That tree is over five feet tall and I am looking for a place to plant it in our yard.


Close up of a bell pepper on one of the plants I grew from seed.
 

The other raised bed is where I planted the six pepper plants my husband bought. They have done fantastic! The first peppers I harvested were from the plants I grew from seed, but these have surpassed them. We are about to the point of calling friends and asking if they want any, as well as freezing some. We made stuffed peppers last weekend using peppers we grew. Very satisfying.

I also grow purslane in that bed, another green I add to salads and put on sandwiches, as well as calendula and a few coreopsis that grew from seeds left from last year's plant.

And, I have peanuts growing in there! This wasn't what I had planned, but when neighbors put out peanuts for the squirrels, who then bury them in my garden, what can I do? If the peanut sprouts, I put it in the bed. I did this last year in a couple of small containers and actually grew peanuts. 

Wouldn't it be fun to make my own peanut butter from peanuts I grew?!?


One of the tomato plants my husband bought. It has done really well, and there are 8-10 tomatoes on there. I have already harvested a few as they have begun to turn color. As you can tell from the leaves, it is getting stressed in the Florida summer sun. Once I pick the tomatoes on there, I'll pull the plant.
 
NOTE: When should you harvest tomatoes? I always thought you should leave them on the vine until they are red and fully ripe. As tomatoes began turning this year, I lost a number of them to some critter or critters who would peck a hole or take a bite. This was only in the containers that had cages on them, so I think they were using the cage to get to them. 
 
To get more of my harvest, I began to pick them as soon as they were obviously changing color and let them ripen in front of a window.
 
Then I came across this Reel on Instagram on the best time to pick tomatoes. Turns out, I was doing the right thing! 
 
Who knew vine-ripened was just a marketing ploy? 


Along the west fence are (from the back) lemongrass, sage, moringa, and two containers with sweet potatoes.

Along this side of the fence are mainly ornamental and flowering plants - cannas, aloe vera, geraniums, and more hanging baskets of airplane plants.

Summer has definitely arrived here. In fact, it arrived in mid-May, which is early for us. So far, most things are hanging in there - the bell peppers thrive in this weather - but the next month will see the last of these tomato plants. Hopefully the green beans will come through. I'm going to buy some nylon netting to use as a shade cloth during the heat of the day. Once I set that up and see how it works, I'll have a post on that.

How is your garden growing this time of year?

Have you downloaded my free Plant Information Sheet? Print out as many copies as you need so you can record the growing, harvesting, and using information for everything you grow. Click here to learn more and get your copy.
07 October 2021

Homegrown and Homemade - Basil Pesto

 In this episode of Homegrown and Homemade, I make basil pesto!

Pesto from Basil I Grew from Seed

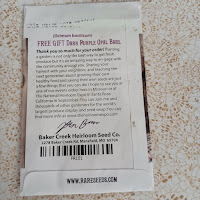
Seed packet for purple opal basil from Baker Creek.
Backstory - in December 2019, I ordered seeds from Baker Creek. In my order they sent a free package of Dark Purple Opal basil seeds. I planted them in the spring of 2020 and they did really well in my garden. I kept saying I was going to make pesto with it, but I didn't own a food processor. I read articles about doing it by hand with a kitchen knife and thought I would give it a try. But I never did.

I planted the basil again this year, and was determined to do more than add the basil to salads and sandwiches. I bought a food processor and within a day was picking basil and making pesto.  

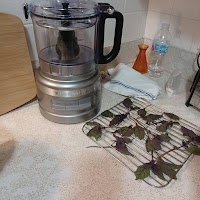
Food processor and basil on a drying rack.

I had more basil than I needed for that batch of pesto, so I put them on a rack to slowly air dry in my oven. 

My basil plant is still producing and I plan to make more pesto, both to eat fresh and to freeze for eating later.  I have planted more seeds and am letting some go to seed to learn if I can keep some going through the winter. 

What is really exciting about this having something else to put on my pasta. I had trouble with acid reflex a few years ago, and one thing I did to help control it was eliminate tomato-based pasta sauces. Since then, I've eaten pasta with a splash of olive oil and some cheese. It is good that way, but I got tired of only that. This summer I started taking fresh tomatoes, bell peppers and some greens from my garden, sautéed them in some olive oil and tossed with pasta and parmesan cheese. And now, I can make pesto and use that as well!

Making the Pesto

I'm reading The Homemade Pantry: 101 Foods You Can Stop Buying and Start Making by Alana Chernila and adapted her recipe. Here's what I did:

Chopped 1/2 cup walnuts in the food processor. 

Added in 1 teaspoon lemon juice and 2 cups packed, fresh basil leaves roughly chopped

Processed until basil leaves were finely minced. 

Sprinkled in garlic powder (fresh garlic can be another trigger to my reflux) and 1/2 teaspoon salt, then turned on processor and poured in 1/2 cup olive oil and processed for a few more seconds. (Basically, I ran it until it looked like I wanted it to.)


Using and Storing the Pesto

Basil pesto in a plastic bowl with a spoon.

I ate some as a dip with crackers, then put the rest in a container, covered with olive oil, and stored in fridge. You can add in grated parmesan cheese when you eat it. You can also put in freezer (without cheese) and store for up to 6 months.

Once the basil in the oven is dry, I'm going to crumble it up and use in recipes as needed.

22 August 2021

Homegrown and Homemade - August 18, 2021

 Here is a triumph for this week:

Bowl with homegrown salad

That is a salad I made to go with my dinner one night. And is all homegrown.

For the salad I picked New Zealand spinach, basil, purslane, celery leaves and stalks (regrown), lemon balm, chives, and bell peppers.

For the dressing, it was homemade with ingredients I bought at the store: olive oil, apple cider vinegar, peppercorns and mustard I made from mustard seeds and vinegar.

Compared to what many people produce from their garden this may not seem like much, but I am pleased that I can put together part of my meal from what I grew in my urban container garden. 

And a confession - this was not the best salad I have ever eaten. I think a different mix of greens (some lettuce would have been nice) or a different dressing would have made it better. But it filled me up and I am proud of being able to grow some of the food I eat.